

High Protein No-Bake Cookies (Chocolate Peanut Butter)

January 28, 2025
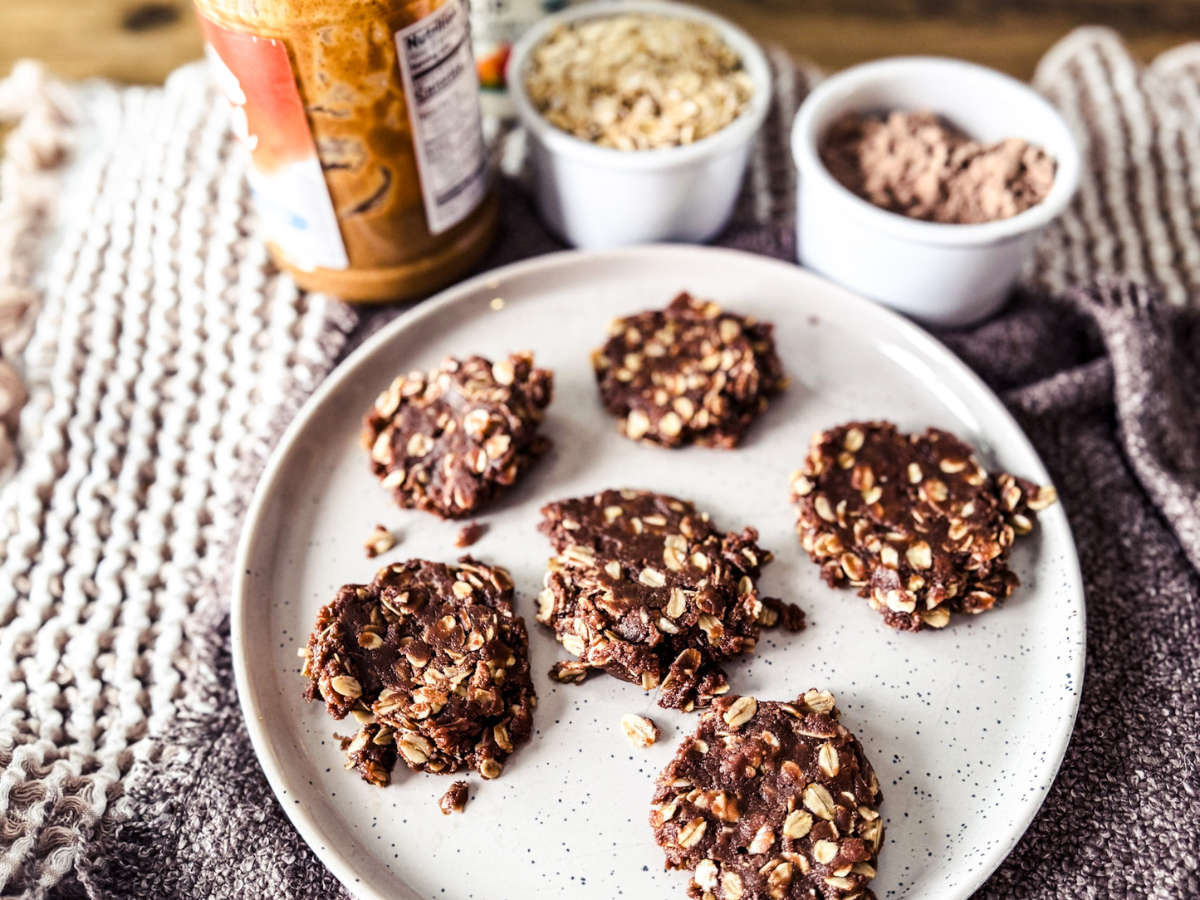
These high protein no-bake cookies taste like the chocolate peanut butter no-bake cookies you grew up eating — chewy, fudgy, deep chocolate — with a protein boost from chocolate protein powder and maple syrup instead of a cup of refined sugar.
I tested these on a group of kids and they couldn’t get enough. That’s when you know you are on to something.
Why This Recipe Works
No-bake cookies have been around for decades for a reason — they come together in under 20 minutes, require almost no cleanup, and curb your sweet tooth. The classic version uses a cup of white sugar, butter, cocoa, and milk boiled together, then stirred into oats and peanut butter. It might be one of the most satisfying snacks ever made.
This version keeps everything that makes that recipe work — the boil, the peanut butter, the oats, the fudgy texture — and swaps refined sugar for maple syrup and adds chocolate protein powder to the oat mixture. The result is a cookie that has the same nostalgic, rich chocolate peanut butter flavor with a meaningful protein boost from both the powder and the peanut butter.
What makes this recipe specifically different from most protein no-bake cookie recipes is the technique. Most of those recipes are just a mix-and-chill situation — combine everything cold, scoop, refrigerate. This uses the real no-bake cookie method: boiling the butter, maple syrup, and milk together for exactly the right amount of time. That boil is what allows the cookies to set at room temperature into a proper chewy, fudgy cookie rather than a soft refrigerator ball that falls apart the moment it warms up.
The boil time matters. One minute and 15 seconds from the moment it reaches a rolling boil. Set a timer. That’s the whole secret.
Key Ingredient Notes
Rolled oats. The base of the cookie and what gives it the chewy, hearty texture. Use old-fashioned rolled oats — quick oats are more finely milled and result in a mushier, less satisfying texture. If you need gluten-free, certified gluten-free rolled oats work perfectly.
Chocolate protein powder. This gets mixed directly into the dry oat mixture before being stirred into the hot liquid. Chocolate protein powder adds both the chocolate flavor and the protein boost without needing a separate addition of cocoa powder. The brand matters more than you’d think — use a protein powder you actually like the taste of, because the flavor comes through in the finished cookie. A powder that tastes chalky or artificial on its own will taste chalky and artificial in the cookie.
Butter. Real unsalted butter, melted into the maple syrup and milk. The fat from the butter is part of what helps the cookies set properly during the boil.
Maple syrup. The sweetener that replaces refined sugar in this version. It brings a subtle caramel depth alongside the sweetness that works really well with the chocolate and peanut butter. Pure maple syrup — not pancake syrup, which is mostly corn syrup with artificial maple flavor.
Milk. Combined with the butter and maple syrup in the saucepan. Any milk works — whole milk gives the richest result, oat milk or almond milk work for a dairy-free version.
Peanut butter. Creamy natural peanut butter, stirred in off the heat. Natural peanut butter (just peanuts and salt) gives the cleanest flavor. Avoid no-stir varieties with added oils if you’re keeping the ingredient list clean — they can make the cookies slightly greasy.
Vanilla extract. Stirred in with the peanut butter off the heat. Two teaspoons rounds out the chocolate and adds warmth to the overall flavor. Real vanilla extract, not imitation.
Variations and Substitutions
Almond butter instead of peanut butter. A direct swap with a slightly different flavor profile — nuttier and a little less bold than peanut butter. Works well for anyone avoiding peanuts.
Sunflower seed butter. The nut-free option. Same amount, same method. The cookies will have a slightly earthier flavor but still work well.
Vanilla protein powder. If you only have vanilla protein powder, add 2 tablespoons of unsweetened cocoa powder to the saucepan with the butter and maple syrup to maintain the chocolate flavor.
Add chocolate chips. Stir in ¼ cup of chocolate chips right at the end with the oats for extra pockets of chocolate throughout. Mini chips work best so they distribute evenly.
Add flaky sea salt. A pinch of flaky sea salt pressed on top of each cookie right after smooshing takes the chocolate peanut butter combination somewhere genuinely special.
Dairy-free. Swap the butter for coconut oil (same amount, solid at room temperature) and use oat milk or almond milk in place of regular milk. The cookies will still set, though coconut oil gives them a slightly different texture.
How to Make High Protein No-Bake Cookies
- Mix the dry ingredients. In a medium bowl, combine the rolled oats and chocolate protein powder. Stir until the protein powder evenly coats the oats. Set aside — this mixture goes in last.
- Make the base. In a medium saucepan over medium heat, add the butter and maple syrup. Stir until the butter is fully melted and the two are combined.
- Add the milk and bring to a boil. Pour in the milk and stir to combine. Increase heat slightly and bring the mixture to a full rolling boil — not a simmer, a real rolling boil where the whole surface is bubbling. Once it hits a rolling boil, start your timer.
- Boil for exactly 1 minute and 15 seconds. Stir frequently during the boil. Don’t walk away. This timing is what determines whether the cookies set — see the section below.
- Add peanut butter and vanilla. Remove the pan from the heat. Immediately stir in the peanut butter and vanilla extract until fully melted and smooth.
- Stir in the oat mixture. Add the oat and protein powder mixture to the saucepan and stir until every oat is coated and the mixture is fully combined. Work quickly — the mixture starts setting as it cools.
- Drop and smoosh. Drop spoonfuls of the mixture onto a sheet of parchment paper. Then use a spatula or the flat bottom of a glass to smoosh each one down into a flat cookie shape. The smoosh needs to happen while the cookies are still warm and pliable.
- Let set for 30–40 minutes. Leave at room temperature until the cookies are fully set and firm. Don’t move them during this time — let them cool undisturbed.
The Boil — Why It Matters
This is the most important part of making no-bake cookies and the step that determines whether your batch succeeds or fails.
When you boil the butter, maple syrup, and milk together, you’re doing something similar to making candy — you’re concentrating the sugars and changing their structure. Once the mixture cools, those sugars firm up and hold the cookie together at room temperature. If you don’t boil long enough, the cookies stay soft and sticky and never fully set. If you boil too long, the sugars crystallize and the cookies come out dry and crumbly.
One minute and 15 seconds from the moment it reaches a full rolling boil is the window that works. A full rolling boil means the entire surface of the liquid is bubbling vigorously — not just around the edges. Start your timer from that moment, not from when you turn up the heat.
Use a real timer. Eyeballing it is how you end up with a batch that never sets.
How to Store and Freeze
Room temperature: Store in an airtight container at room temperature for up to 3 days. These are preservative-free so they won’t last as long as store-bought cookies.
Refrigerator: An airtight container in the fridge extends the life to 5–7 days. The cookies firm up a bit more when cold, which a lot of people actually prefer.
Freezer: These freeze very well. Place cooled cookies in a single layer on a parchment-lined baking sheet and freeze until solid, then transfer to a freezer-safe bag or container for up to 3 months. Thaw at room temperature for 15–20 minutes or eat them cold straight from the freezer — they’re genuinely good that way.
Making a double batch specifically to stock the freezer is one of the better decisions you can make on a Sunday afternoon. Pull one or two out for an after-school snack, a post-workout treat, or a late-night sweet tooth moment without having to make anything from scratch.
Expert Tips
Use a real timer for the boil. One minute and 15 seconds sounds overly precise but it matters. Start counting from the moment you see a full rolling boil across the whole surface.
Work quickly once you remove from heat. The mixture starts setting as it cools. Get your oats stirred in and the cookies dropped and smooshed before the mixture gets too stiff to work with. Have your parchment paper ready before you even start cooking.
Use a cookie scoop for consistent sizing. Even-sized cookies set more evenly and look much better. A 2-tablespoon cookie scoop is the right size for this recipe.
Smoosh while warm. If the cookies cool before you smoosh them they won’t flatten — they’ll just crack. Do it immediately after dropping.
Don’t substitute quick oats. Quick oats are more finely milled and result in a mushier, less structured cookie. Old-fashioned rolled oats give you the chewy, hearty texture that makes these worth making.
Your protein powder flavor is the cookie flavor. This is worth repeating. Use a chocolate protein powder you genuinely enjoy drinking on its own. A poor-tasting protein powder will make a poor-tasting cookie.
Frequently Asked Questions
Why won’t my no-bake cookies set? Almost always the boil wasn’t long enough or didn’t reach a full rolling boil. A simmer or gentle boil isn’t enough to properly concentrate the sugars. You need a vigorous, full rolling boil across the entire surface for the full 1 minute 15 seconds. If your cookies don’t set after 40 minutes, pop them in the refrigerator — they should firm up there even if the boil was slightly short.
Why are my no-bake cookies dry and crumbly? The boil went too long, or there wasn’t enough fat in the mixture. If you boil longer than about 90 seconds the sugars start to crystallize and the cookies come out dry. Measure the peanut butter and butter carefully — too little fat is the other common cause.
Can I use any protein powder? Use whatever chocolate protein powder you like the taste of. Whey protein, plant-based protein, and casein all work in this method since the protein powder goes in with the dry ingredients rather than being heat-activated. Just make sure it’s a flavor you enjoy — it comes through strongly in the finished cookie.
Do these need to be refrigerated? They’re shelf-stable at room temperature for up to 3 days in an airtight container. Refrigerating extends the life and makes them firmer, which many people prefer. Either way works.
Can I make these without protein powder? Yes — substitute an equal amount of unsweetened cocoa powder or additional rolled oats. The cookies won’t have the same protein content but the method and texture work the same way.
Can I use a sugar substitute instead of maple syrup? Liquid sweeteners that behave similarly to maple syrup — like honey or agave — work as direct swaps. Granular sweeteners like coconut sugar need to be dissolved in the milk before bringing to a boil, which changes the timing slightly. Monk fruit syrup works well too.
Other Recipes You Will Love
https://healthierhomemade.co/recipe/chocolate-peanut-butter-cups/
High Protein No-Bake Cookies (Chocolate Peanut Butter)
Ingredients
- 1/2 cup butter
- 1/3 cup maple syrup
- 1/2 cup milk
- 3/4 cup organic creamy peanut butter
- 2 tsp. vanilla extract
- 2 cup rolled oats
- 1/2 cup chocolate protein powder We like E+Patrol

Instructions
- Place a medium sauce pan over medium heat.
- Combine 2 cup rolled oats and 1/2 cup chocolate protein powder together. Set aside
- Add in the 1/2 cup butter and 1/3 cup maple syrup. Stir until it is melted together.
- Add in the1/2 cup milk and bring to a boil.
- Let rolling boil about 1 minute and 15 seconds from the time it starts boiling. Stir frequently.
- Mix in 3/4 cup organic creamy peanut butter and 2 tsp. vanilla extract.
- Remove from heat and stir in the rolled oats and chocolate protein powder mixture.
- Drop onto a piece of parchment paper.
- Smoosh with a spatula or the bottom of a glass.
- Let set 30-40 minutes.
- Enjoy!


Leave a Reply